
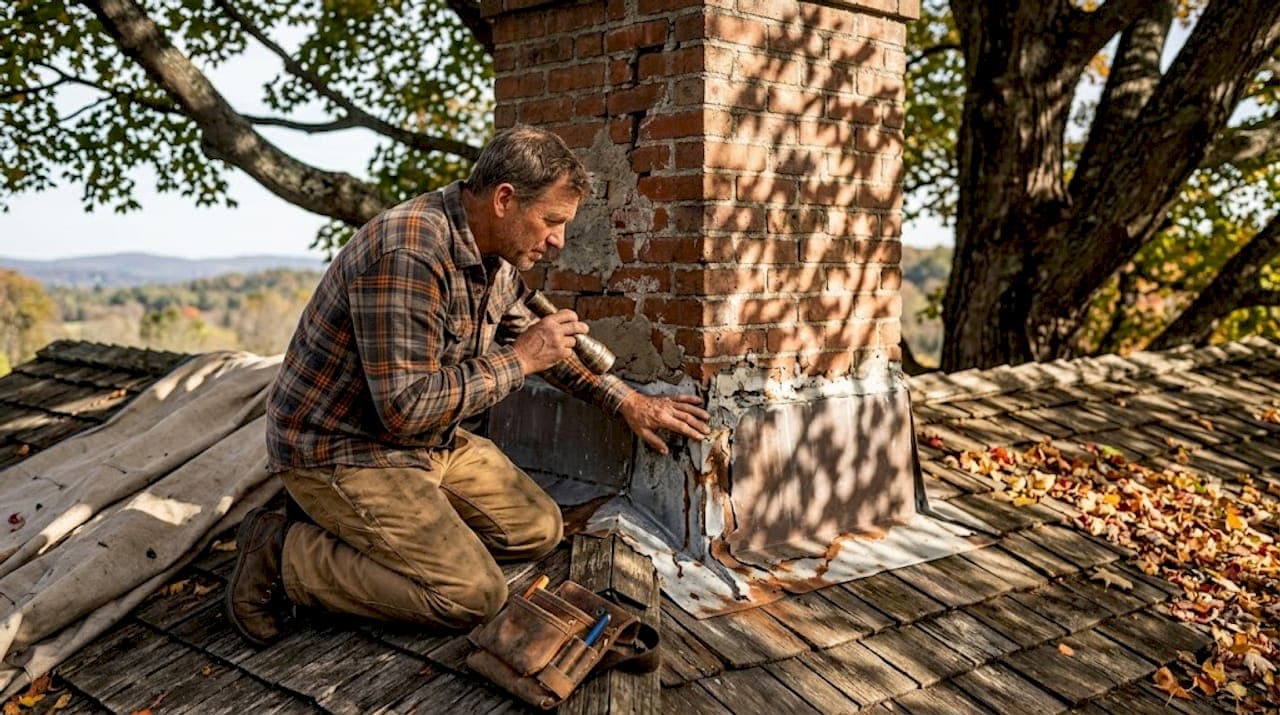
Water gets into older homes in ways that take years to show up on the ceiling. Chimney flashing repair in older homes is one of the most overlooked maintenance tasks, yet failed flashing is one of the leading causes of interior water damage, mold growth, and structural decay around the chimney area. If your home was built before the 1980s, the flashing sealing your chimney to the roof may be decades past its service life, and the warning signs are easy to miss until the damage is severe. This guide covers how to identify failure, prepare for repair, execute it correctly, and confirm it worked.
Table of Contents
- Key takeaways
- How old chimney flashing fails in older homes
- Preparing for flashing repair on older homes
- Step-by-step chimney flashing repair process
- Verifying your repair and preventing future failure
- Our perspective on chimney flashing in older homes
- Protect your home with expert flashing repair
- FAQ
Key takeaways
| Point | Details |
|---|---|
| Older flashing fails predictably | Sealants deteriorate within 5 to 10 years; metal flashing on 20-plus-year roofs is often significantly compromised. |
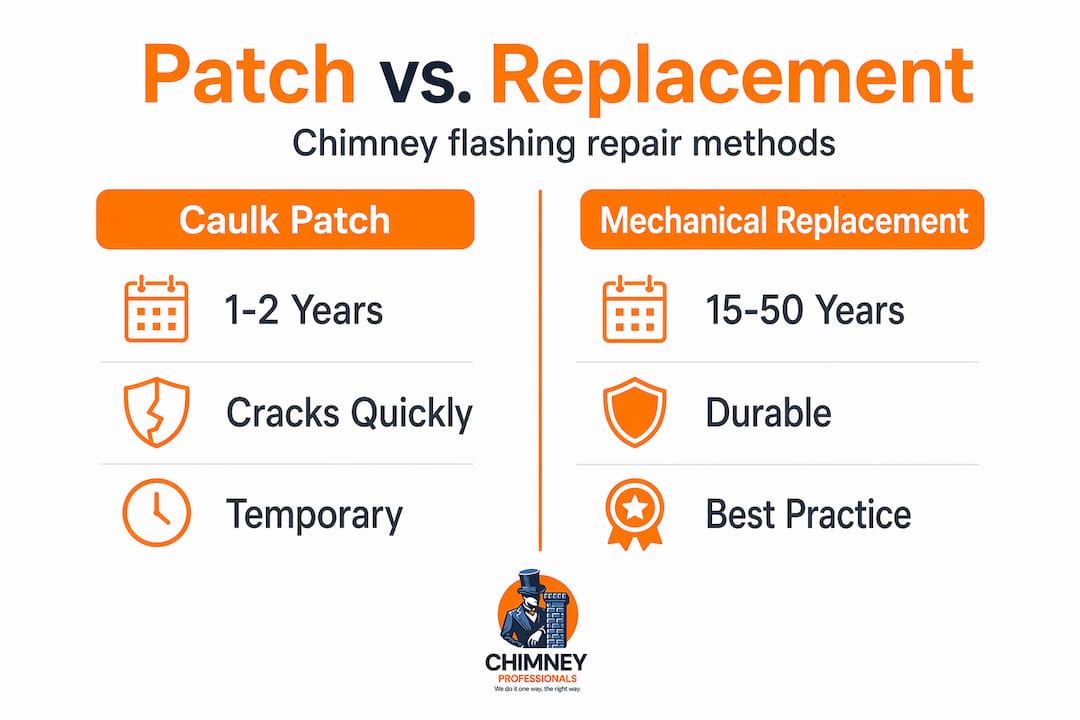
| Caulk is not a repair | Patching with caulk or roofing cement fails within one to two winters and delays proper mechanical replacement. |
| Counter flashing must be embedded | Surface-mounted counter flashing fails rapidly; it must be cut into the mortar joint for lasting results. |
| Material choice matters | Copper flashing lasts 50-plus years; galvanized steel lasts 15 to 25 years. Match the material to your long-term goals. |
| Spring inspections prevent damage | Annual roof and flashing inspections before storm season catch failures before they become costly interior problems. |
How old chimney flashing fails in older homes
Chimney flashing is the system of metal pieces and sealed joints that prevent water from entering where the chimney meets the roofline. In older homes, this system has often been repaired multiple times by multiple contractors, and not always correctly. Understanding how old chimney flashing fails starts with the materials themselves.
Roofing sealants dry, shrink, and crack within 5 to 10 years, meaning flashing on a 20 to 25-year-old roof is usually significantly deteriorated even if the shingles still look fine. The metal itself, typically galvanized steel, develops rust along the edges and at fastener points over time. When older flashing begins to lift or buckle slightly, it creates a gap that channels water directly into the roof deck and framing below.
Older homes also carry the legacy of past repair shortcuts. Many flashing failures in aged properties stem from previous contractors patching with roofing cement instead of replacing flashing properly. These band-aid fixes fail fast.
Several factors make chimney flashing in older properties especially vulnerable:
- Freeze-thaw cycles. Repeated freezing and thawing forces the metal to expand and contract, loosening joints and pulling sealant away from the chimney face.
- Missing chimney crickets. Chimneys wider than 30 inches should have a cricket to direct water around the back. Many older installations lack one entirely, causing water to pool behind the chimney.
- Mortar joint erosion. As chimney masonry ages, the mortar joints holding counter flashing in place deteriorate, loosening the seal.
- Settlement and movement. Older homes shift over decades, and even minor structural movement can crack or separate flashing at the seams.
Watch for these warning signs inside and outside your home: visible gaps or rust streaks at the chimney base on the roof, musty attic odors and damp insulation near the chimney, water stains on ceilings or walls adjacent to the fireplace, and daylight visible through the attic around the chimney stack.
Pro Tip: Don't just check the ceiling directly below the chimney. Leaks often track along framing members before appearing as a stain several feet away from the chimney itself.
Preparing for flashing repair on older homes
Before you start repairing chimney flashing, gathering the right tools and materials saves you a second trip to the hardware store and keeps you safe on the roof. The preparation phase is also where you decide whether this is a job you handle yourself or call in a licensed professional.

Recommended tools and materials
| Item | Purpose |
|---|---|
| Pry bar and flat bar | Removing old flashing and shingles without cracking them |
| Cold chisel and hammer | Cutting reglet grooves in mortar for counter flashing |
| Tin snips | Cutting new metal flashing pieces to shape |
| Caulk gun with urethane sealant | Sealing the reglet groove after counter flashing is set |
| Roofing nails and galvanized screws | Securing step flashing to roof deck |
| Safety harness and non-slip footwear | Working safely at roof height |
| Flashlight and moisture meter | Inspecting attic and decking for hidden water damage |
For material selection, metal flashing longevity varies significantly: galvanized steel lasts 15 to 25 years while copper lasts 50-plus years. For an older home you plan to keep long term, copper is worth the added cost. It resists corrosion, weathers gracefully, and requires no painting or coating. Galvanized steel is the budget-friendly option, but plan to inspect it every few years.
Safety is non-negotiable. Working on a sloped roof without a harness is one of the most common causes of serious DIY injuries. Use a certified roof anchor point, wear rubber-soled shoes, and never work on a wet or frosted roof.
Pro Tip: Before pulling a single piece of old flashing, take detailed photos from multiple angles. These become your reference for reinstallation and are useful documentation if you ever need to make an insurance claim.
When to call a professional: if your chimney has significant masonry damage, if the roof deck shows signs of rot below the flashing, or if the chimney is wider than 30 inches and lacks a cricket, the repair scope exceeds a straightforward DIY project. A qualified flashing repair specialist brings the tools and experience to handle these conditions without creating new problems.
Step-by-step chimney flashing repair process
This is where proper technique separates a repair that lasts 20 years from one that fails before the first winter. Follow these steps carefully, and pay particular attention to the counter flashing installation, where most errors occur.
-
Inspect and document existing conditions. Walk the roof and photograph the entire chimney perimeter. Note where flashing is lifted, cracked, or missing. Check the attic for signs of hidden water damage along framing and decking near the chimney.
-
Remove damaged shingles carefully. Use a flat bar to lift shingles in the two to three courses surrounding the chimney. Work slowly to avoid cracking shingles you plan to reuse. Set them aside in order so reinstallation is straightforward.
-
Remove old flashing completely. Pull all existing step flashing, base flashing, and counter flashing. Do not attempt to layer new flashing over old. Hidden rust, bent metal, or old sealant underneath will compromise your new installation from day one.
-
Inspect and repair the roof deck. Before installing anything new, check for soft spots, rot, or water-damaged decking. Replace any compromised sections of plywood or OSB. Skipping this step means new flashing sealed over rotted wood.
-
Install step flashing with shingles. Step flashing pieces should be woven alternately with each course of shingles, with each piece extending at least 2 inches onto the chimney face and 4 inches onto the roof deck. Step flashing must be integrated in overlapping layers that channel water downward. Incorrect sequencing creates latent leaks even when there is no visible damage.
-
Install or repair the chimney cricket. If your chimney is wider than 30 inches, a chimney cricket is required under IRC building code. This triangular structure diverts water and prevents ice damming behind the chimney. Frame it with plywood, cover it with metal flashing, and integrate it with the surrounding step flashing.
-
Cut the reglet and embed counter flashing. This is the step most DIYers and shortcut contractors get wrong. Counter flashing must be embedded in mortar joints, not just surface-mounted with caulk. Use a cold chisel or angle grinder to cut a horizontal groove (reglet) into the mortar approximately one inch deep. Fold the top edge of the counter flashing into the groove, then seal it with urethane sealant. This method withstands freeze-thaw cycles because the flashing is mechanically locked, not just glued.
-
Apply sealant only where needed. Use urethane or polyurethane sealant sparingly at joints and transitions. Caulk used as a flashing substitute fails within one to two winters. Sealant is a supplement to mechanical installation, not a replacement for it.
-
Reinstall shingles. Work from the bottom course upward. Nail shingles above the flashing line, ensuring each course overlaps the one below by the manufacturer's specified amount.
Pro Tip: At every stage of counter flashing installation, test the fit before applying sealant. A counter flashing piece that sits loosely in the reglet will fail no matter how much sealant you use around it.
Caulk-only patch vs. proper mechanical replacement
| Approach | Expected lifespan | Failure mode |
|---|---|---|
| Caulk or roofing cement patch | 1 to 2 years | Shrinks, cracks, and separates with temperature cycles |
| Surface-mounted counter flashing | 3 to 7 years | Loses adhesion; pulled free by freeze-thaw movement |
| Embedded counter flashing with urethane | 15 to 25-plus years | Mechanically locked; resists movement and moisture |
Verifying your repair and preventing future failure
A completed repair is not a confirmed repair until you have tested it and established a monitoring routine. Water can still find its way through minor oversights, and catching a small problem early is far less costly than discovering it through a stained ceiling.
Start by running a garden hose along the roof near the chimney for 10 to 15 minutes while someone watches the attic interior. This controlled test reveals any remaining gaps without waiting for a rainstorm. Use a moisture meter to check the decking and framing around the chimney for residual dampness.
Watch for these signs of a failed or incomplete repair in the weeks and months after the work is done:
- Musty odor returning to the attic or rooms adjacent to the chimney.
- New water stains on ceilings or walls, even small ones.
- Visible daylight or draft around the chimney in the attic.
- Efflorescence (white mineral deposits) appearing on the chimney exterior, which signals ongoing moisture infiltration.
Homeowners who focus only on shingles often miss underlying flashing deterioration because leaks start long before shingles show visible wear. For that reason, annual flashing inspections are your best defense, not just post-repair checks.
A practical maintenance schedule looks like this: inspect flashing every spring before storm season and again in the fall before freezing temperatures arrive. Document each inspection with photos and note any changes in the flashing condition over time. This record is useful for spotting gradual deterioration and for any future chimney repair assessment.
Professional roof inspections before storm seasons identify flashing failures early. Catching a compromised seal in spring costs far less than repairing the water-damaged framing and insulation that follows a wet summer.
Pro Tip: Keep a dated photo log of your chimney flashing in a folder on your phone. Two photos a year takes two minutes and gives you a clear visual record of how quickly your sealant or metal is aging.
Our perspective on chimney flashing in older homes
I've inspected hundreds of chimneys across the Dallas-Fort Worth area, and the pattern I see in older homes is consistent. The flashing was either original and long past its service life, or it had been patched so many times by different contractors that no one could say what was underneath. Both situations lead to the same place: water inside the home.
What most homeowners don't realize is that localized flashing repairs cost $300 to $800, while full replacement runs $500 to $1,500 for a standard chimney. Those numbers sound significant until you price out replacing a water-damaged roof deck, insulation, and drywall. I've seen simple two-year-old flashing patches cause $8,000 in interior damage because they were never meant to be permanent fixes.
The other thing I've learned: material selection is a decision, not a default. Most homeowners accept whatever the contractor suggests. In my experience, copper flashing on an older home that you intend to own for 20-plus years is the smarter long-term investment. You pay more upfront and don't think about it again.
The emotional side of this is real too. A leaking chimney in an older home feels overwhelming, especially when multiple contractors have given you different answers over the years. My advice is to get an inspection from someone who will show you what they found, explain why it failed, and give you a written scope of work before any money changes hands.
— chimneyprofessionalservices
Protect your home with expert flashing repair

At Chimney Professional Services, we work with older homes across the Dallas-Fort Worth Metroplex every day, and we understand that aged chimneys come with unique challenges that general roofers often overlook. Our certified inspectors assess flashing condition thoroughly, identify hidden water damage, and recommend the right repair approach for your specific chimney design and roof configuration.
Whether you need targeted flashing replacement, full chimney masonry repair, or an emergency response to an active chimney leak, our team uses durable materials and proven installation methods designed to last. We back our work with quality guarantees and are available daily from 8 AM to 8 PM. Contact Chimney Professional Services today to schedule your inspection and get a clear, written assessment of your chimney's condition.
FAQ
What does chimney flashing repair on an older home typically cost?
Localized flashing repairs run $300 to $800, and full replacement for a standard chimney costs $500 to $1,500. Copper or larger chimneys can reach $1,200 to $2,500, with labor accounting for 60 to 70 percent of the total.
Can I repair chimney flashing with caulk alone?
No. Caulk-only patches fail within one to two winters because the material shrinks and cracks with temperature changes. Mechanical replacement of the metal flashing is the only permanent solution.
How do I know if my chimney flashing has failed?
Common signs include musty attic odors, damp insulation near the chimney, water stains on ceilings, visible rust streaks on the roof at the chimney base, and daylight visible through the attic around the chimney stack.
How long does chimney flashing last on an older home?
Galvanized steel flashing lasts 15 to 25 years while copper lasts 50-plus years. Sealants fail much sooner, typically within 5 to 10 years, so the metal may still be intact while the joints are already leaking.
How often should I inspect chimney flashing?
Inspect your chimney flashing at least twice a year. Spring inspections before storm season are especially effective because temperature transition effects tend to reveal failures that developed over winter.