
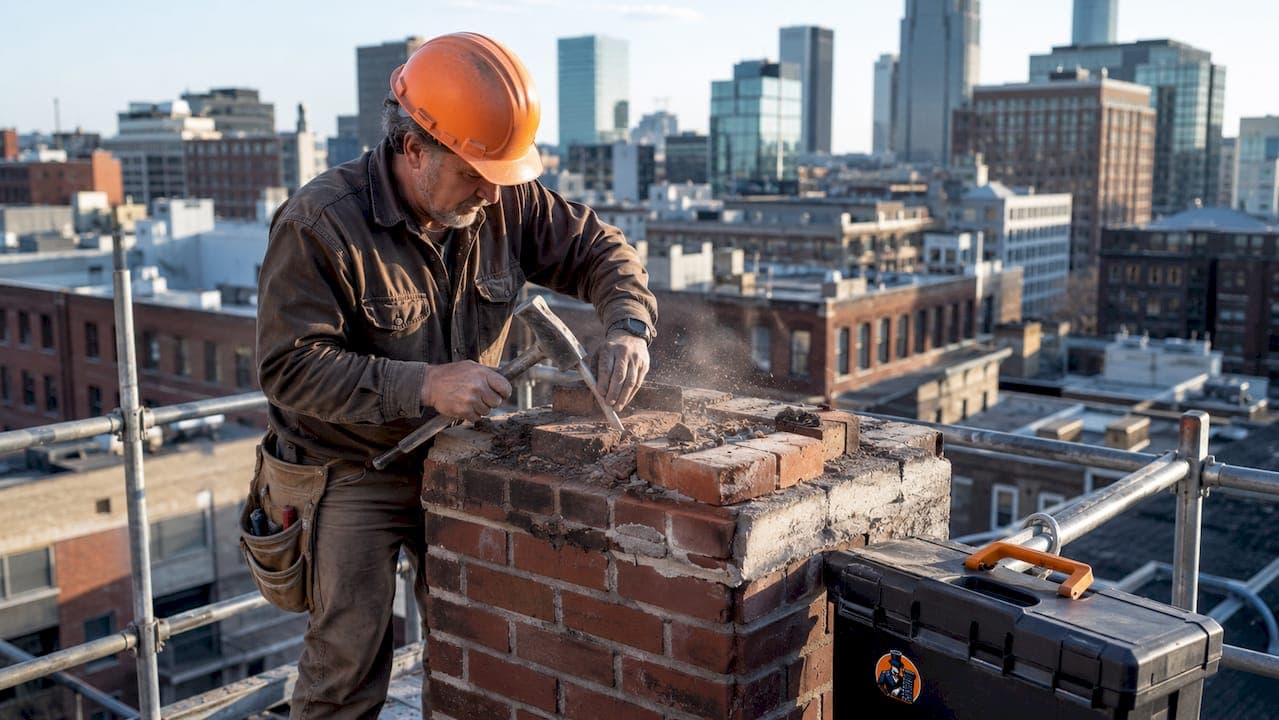
Rebuilding a chimney top with deteriorated bricks is defined as the process of removing failing masonry above the roofline and reconstructing it to restore structural integrity and weather resistance. In the masonry trade, this is called a partial chimney stack rebuild. Dallas-Fort Worth homeowners face this problem more often than they expect. The region's intense summer heat, sudden hailstorms, and freeze-thaw cycles in winter all accelerate brick spalling and mortar breakdown. This guide covers inspection, tools, step-by-step procedures, and prevention strategies so you know exactly what a proper chimney top restoration requires.
How to inspect and assess chimney top damage
A thorough inspection is the first step before any rebuild decision. Damage frequently hides at the chimney top and liner, making a ground-level look unreliable for scoping the actual repair. A roof-level inspection by a qualified professional gives you an accurate picture of what needs to come down and what can stay.
Visual signs that point to serious deterioration include:
- Spalling bricks: surfaces flaking, crumbling, or breaking off in chunks
- Crumbling or missing mortar joints between bricks
- Visible cracks running through the chimney crown or flaunching
- A chimney that leans, bulges, or shows movement when touched
- White efflorescence staining, which signals active moisture migration through the masonry
Leaning, bulging, or spalled bricks across multiple areas indicate the need for a partial or full rebuild rather than patch repairs. This matters because repointing alone, which fills mortar joints, cannot fix bricks that have already fractured or lost their face. Spalled bricks accelerate mortar failure and water ingress, so replacing damaged bricks and controlling moisture sources must happen together.
You also need to assess the chimney crown, the flashing where the chimney meets the roof, and whether a chimney cap is present and intact. Each of these components is a potential water entry point. Learn how to read these visual damage signs in DFW before deciding on repair scope.
Pro Tip: If any brick in the upper section moves when you press it, stop and call a professional. Any movement or leaning requires a professional rebuild to a structurally sound point, and attempting to patch moving masonry is a safety risk.
What tools and materials do you need for a chimney rebuild?
Having the right tools before you start prevents delays and poor workmanship. The table below covers the core items for a chimney top rebuild.
| Category | Item | Purpose |
|---|---|---|
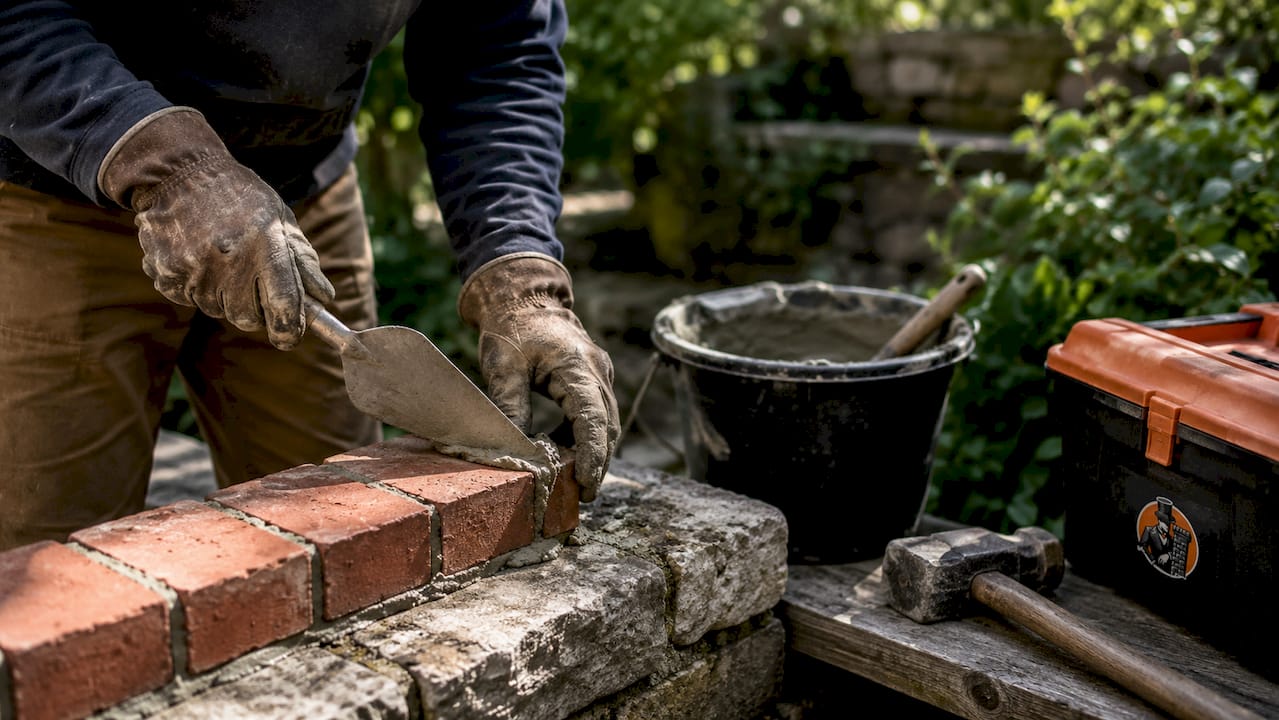
| Masonry tools | Cold chisel, club hammer, tuckpointing trowel | Remove old mortar and set new brickwork |
| Access equipment | Scaffolding tower or secured roof ladder | Safe working platform at chimney height |
| Safety gear | Hard hat, safety goggles, dust mask, gloves | Protect against falling debris and silica dust |
| Materials | Matching replacement bricks, Type S mortar mix | Structural rebuild matching original appearance |
| Weatherproofing | Flaunching mix, lead or aluminum flashing, chimney cap | Seal top and prevent water ingress |
Matching brick size, color, and texture matters more than most homeowners realize. A mismatched brick absorbs moisture at a different rate than surrounding masonry, which creates new stress points within a few seasons. Type S mortar is the standard for chimney work above the roofline because it handles thermal movement and weather exposure better than standard Type N.
Pro Tip: Take a sample brick from the demolished section to a masonry supplier before ordering replacements. Suppliers like Acme Brick, which operates across the DFW area, can match texture and color far more accurately from a physical sample than from a photo.
For scaffolding, a tower scaffold is far safer than a ladder for chimney work. Working at height on a sloped roof with heavy materials is one of the leading causes of serious injury in home repair projects.
Step-by-step process to rebuild deteriorated chimney bricks
A proper rebuild follows a defined sequence. Skipping steps or rushing any phase produces a chimney that fails again within a few years.
-
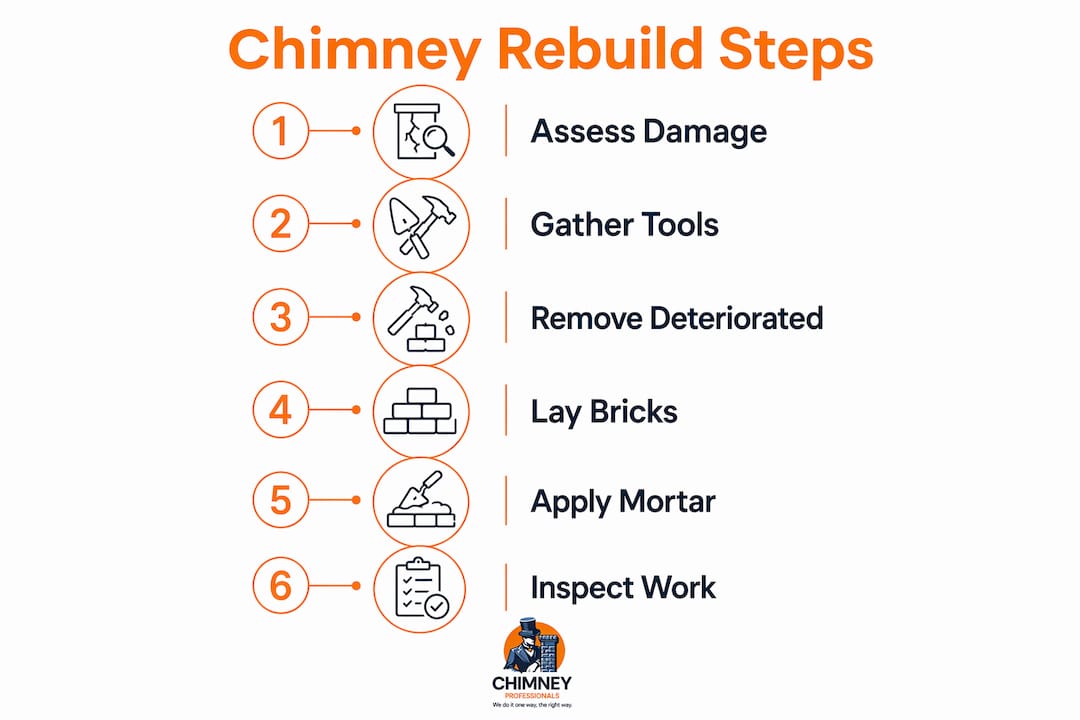
Set up safe access. Erect a scaffolding tower or secure a roof ladder rated for the load. Never attempt chimney work from an unsecured ladder. Confirm the platform is stable before placing any tools or materials on it.
-
Remove deteriorated bricks and mortar down to a stable base. Use a cold chisel and club hammer to carefully dismantle the failing section. Work from the top down. A partial chimney top rebuild involves dismantling masonry above the roofline down to sound brickwork before any new work begins. Do not stop at the first solid-looking course. Tap each brick with the hammer handle. A hollow sound means the bond has failed.
-
Clean and prepare the base. Brush away all loose mortar, dust, and debris from the top course of remaining bricks. Dampen the surface lightly before laying new mortar. Dry masonry pulls moisture out of fresh mortar too fast, which weakens the bond.
-
Lay new bricks to match the original pattern. Mix Type S mortar to a firm, workable consistency. Lay each brick in the same bond pattern as the original, typically running bond or Flemish bond depending on your chimney's design. Butter each brick on the bed and header faces before placing. Check level and plumb every two to three courses.
-
Rebuild or repair the chimney crown and flaunching. The crown is the concrete or mortar cap that covers the top of the chimney stack, sloping outward to shed water away from the flue opening. Flaunching is the mortar bed that holds chimney pots in place and seals the top course of brickwork. A proper rebuild workflow includes renewing flaunching and addressing water control as core steps, not optional finishing touches. Apply the flaunching mix with a smooth outward slope so rainwater runs off rather than pooling.
-
Inspect and repair flashing, then install a chimney cap. Flashing is the metal seal between the chimney base and the roof surface. Damaged or lifted flashing is one of the most common causes of water damage inside the home. Seal or replace it before calling the job done. Then install a new chimney cap. A chimney cap costing $200–$400 stops rain, debris, and animals from entering the flue. That investment protects the entire rebuild from day one. Read more about why chimney cap installation matters for long-term brick protection.
-
Cure mortar properly. Fresh mortar needs at least 24–48 hours to set before exposure to rain or freezing temperatures. In DFW summers, direct sun can dry mortar too fast. Cover new brickwork with damp burlap or plastic sheeting for the first 24 hours to slow the cure and prevent surface cracking.
-
Final inspection and cleanup. Check every joint for voids or cracks. Press firmly on the top course to confirm stability. Remove scaffolding carefully and clean the surrounding roof surface of mortar droppings.
A chimney top rebuild is both a masonry project and a roof integration project. Addressing flaunching, flashing, and water shedding is what separates a rebuild that lasts 20 years from one that fails in two.
Common mistakes when repairing deteriorated chimney bricks
Most chimney top rebuilds that fail within a few years share the same set of avoidable errors.
- Underestimating the damage scope. Stopping the demolition too early leaves compromised bricks in the base courses. Those bricks continue to deteriorate and undermine the new work above them.
- Using the wrong mortar. Standard pre-mixed mortar from a hardware store is often Type N, which is too soft for chimney applications. Type S or Type M mortar is required above the roofline.
- Ignoring moisture sources. Successful chimney masonry restoration must address both brick replacement and water entry points to prevent recurring spalling. Replacing bricks without fixing the flashing or installing a cap means the new brickwork starts deteriorating immediately.
- Rushing mortar cure time. Joints that look set on the surface may still be weak inside. Applying load or removing protection too early causes invisible micro-cracks that let water in.
- Working without proper fall protection. A chimney top rebuild at 20 or 30 feet above grade is a serious fall hazard. Scaffolding is not optional on a two-story home.
- Skipping a professional assessment for extensive damage. Partial chimney rebuilds are more cost-effective long-term than repeated patch repairs, but only when the scope is correctly identified upfront. If you are unsure where sound masonry ends, get a professional opinion before starting.
Brick chimney maintenance tips after restoration
Protecting your rebuilt chimney top requires consistent attention, not just a one-time fix.
- Inspect the chimney every spring and after any major storm. DFW hailstorms can crack fresh mortar joints and dislodge flaunching in a single event.
- Check the chimney cap after high winds. Caps can shift or crack, and a displaced cap immediately exposes the flue and new brickwork to water.
- Examine flashing at least once a year. Look for lifted edges, rust staining, or gaps where the flashing meets the chimney base.
- Seal hairline cracks in the crown or flaunching with a flexible masonry sealant as soon as you spot them. Small cracks cost almost nothing to fix. Left alone, they become the entry point for the next full rebuild.
- Schedule a professional chimney inspection every one to two years. A certified inspector can spot liner damage, creosote buildup, and early-stage mortar failure before they become structural problems.
Pro Tip: Apply a penetrating masonry water repellent to the rebuilt brickwork after the mortar has fully cured, typically 28 days after completion. Products like ChimneySaver Water Repellent are vapor-permeable, meaning they block liquid water while letting the masonry breathe. This single step significantly extends the life of the brickwork in DFW's wet spring seasons.
For guidance on preventing chimney water damage before it reaches the rebuild stage, a proactive maintenance schedule is your best protection.
Key takeaways
A chimney top rebuild succeeds only when it addresses both the failed masonry and every active moisture source at the same time.
| Point | Details |
|---|---|
| Inspect at roof level first | Ground-level assessment misses liner and crown damage that determines true repair scope. |
| Match bricks and mortar exactly | Use Type S mortar and supplier-matched bricks to prevent new stress points in the rebuild. |
| Address all water entry points | Repair flashing and install a chimney cap alongside brickwork to stop recurring deterioration. |
| Cure mortar fully before loading | Allow 24–48 hours minimum before rain or load exposure to prevent hidden joint failure. |
| Maintain after the rebuild | Annual inspections and prompt crack sealing protect the investment and prevent future rebuilds. |
What we've learned after years of DFW chimney rebuilds
After working on chimneys across Dallas, Fort Worth, Plano, and Arlington, one pattern stands out clearly. Homeowners who call us after a failed DIY repair almost always made the same decision: they stopped demolition too early because the bricks looked okay from a few feet away. Tapping each course with a hammer handle takes five extra minutes. It has saved dozens of our clients from repeating the same rebuild two years later.
The other thing we see constantly is a rebuilt chimney top with no cap. A homeowner or a low-bid contractor does solid brickwork, pours fresh flaunching, and then leaves the flue completely open to the sky. The first heavy rain drives water straight down the liner and into the firebox. That is not a masonry failure. It is a planning failure.
Dallas-Fort Worth's climate is genuinely hard on chimneys. Summer temperatures above 100°F expand masonry. Winter cold contracts it. That thermal cycling works mortar joints loose faster than in moderate climates. We recommend Type S mortar for every above-roofline application in this region, and we apply a vapor-permeable water repellent on every rebuild we complete. Those two choices alone add years to the lifespan of the work.
If your chimney leans, if bricks move when you press them, or if you can see daylight through the stack from inside the firebox, do not attempt a DIY repair. The structural risk is real, and the cost of a professional rebuild is far lower than the cost of a chimney collapse or a house fire.
— chimneyprofessionalservices
Trusted chimney masonry repair across dallas-fort worth
When the damage goes beyond a few loose bricks, Chimney Professional Services is the team DFW homeowners rely on for safe, lasting results.

Our certified inspectors assess every chimney at roof level before recommending any repair scope. We handle partial and full chimney rebuilds, tuckpointing, flashing repair, and chimney cap installation across the entire Dallas-Fort Worth Metroplex. Every job meets Texas fire safety codes and is backed by our workmanship guarantee. If water is already getting in, our team also provides chimney leak repair to stop the damage fast. We are open daily from 8 AM to 8 PM. Call Chimney Professional Services today to schedule your inspection and get an accurate, honest assessment of what your chimney actually needs.
FAQ
What does a partial chimney top rebuild involve?
A partial chimney top rebuild involves dismantling failing masonry above the roofline down to sound brickwork, then reconstructing the section with matching bricks, fresh mortar, renewed flaunching, and repaired flashing.
How long does it take to rebuild a chimney top?
Chimney top rebuilds typically take 2–5 days depending on the extent of damage, weather conditions, and whether flashing or crown work is also required.
How much does a partial chimney rebuild cost?
Partial chimney rebuilds range from $3,000 to $10,000, with full rebuilds exceeding $10,000. Costs vary based on damage scope, materials, and whether tuckpointing or flashing repair is included.
Can i repoint instead of rebuilding the chimney top?
Repointing works only when the bricks themselves are structurally sound. If bricks are spalled, cracked, or moving, repointing alone will not restore structural integrity and the mortar will fail again quickly.
How do i prevent chimney bricks from deteriorating again after a rebuild?
Install a quality chimney cap, repair flashing annually, apply a vapor-permeable water repellent after the mortar cures, and schedule a professional inspection every one to two years to catch early-stage damage before it spreads.